We are now forced to use Canvas (a web based LMS) for our courses. I won’t list the reasons why I dislike Canvas and think it’s a terrible thing for education generally but suffice it to say, it’s better for both me and my students to do our work in OneNote. So… how do I leverage OneNote and never have to visit Canvas? PowerAutomate (Flow) to the rescue!
PowerAutomate lets us take content from OneNote and “push” it into Canvas through a Canvas Office365 connector, and have it done automatically in the background so once you set up the “push”, it just repeats it on a schedule. It’s auto-magical!
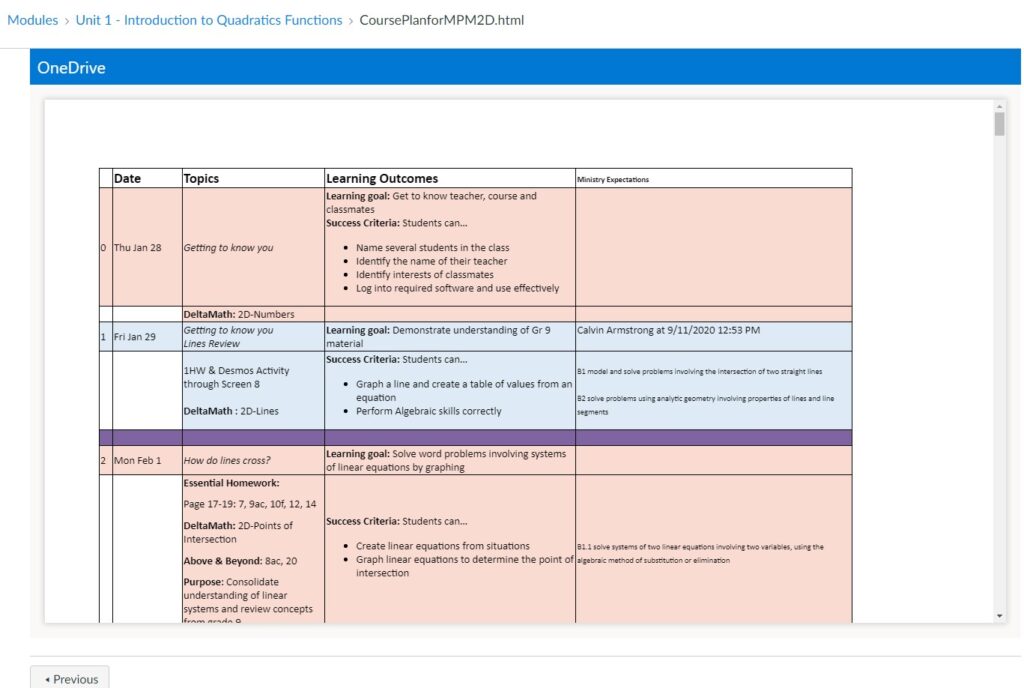
To keep our students (and ourselves!) organized, we always used to have a daily Course Plan as the very first Page in our ClassNotebook. You can see examples here: Page One of your OneNote Class Notebook (continuousformation.blogspot.com) It’s quick & easy to keep things up to date. We’re going to take regular snapshots of this OneNote Page and make it visible in Canvas so that the administration-required Course Plan is available in Canvas.
Our first step is to make Canvas aware of Office365. To do that, we add an Office365 App — but first, we have to grab some security so that the two can talk to one another without anyone listening in.

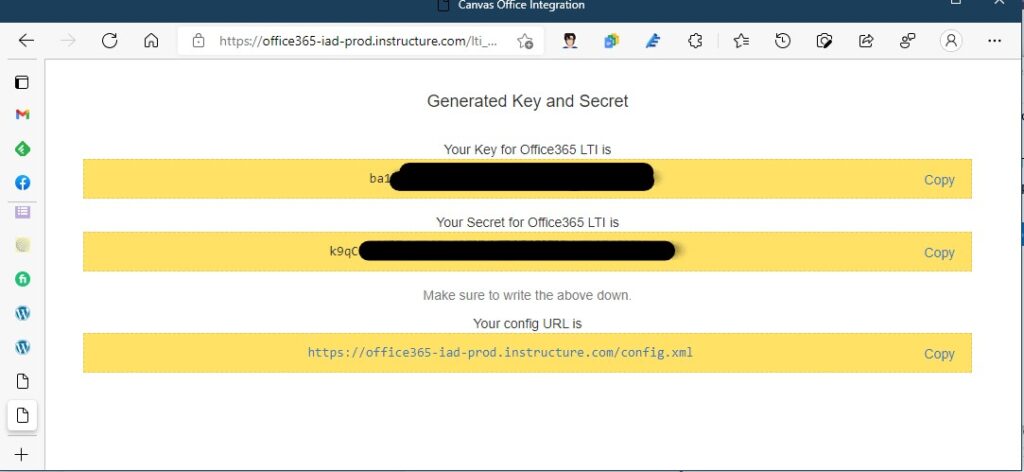
Visit http://office365-iad-prod.instructure.com and you’ll get a button to generate the secret codes that will let the two talk. Leave that window open so that you can easily copy & paste into Canvas.
Now, let’s head off to Canvas and go into the course you want to push into (yes, you have to go to each course to add this connection… sigh. Canvas.)
Go into the Settings area for the course and click on the Apps heading.

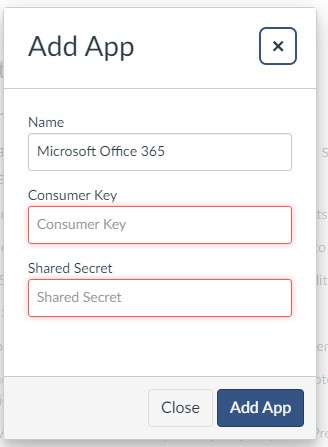
In the Filter box, just type office and Office365 will show up. Click on the Office365 box and you’ll get a pop-up … which is where you’re going to copy & paste the information from the security window you left open (remember, you left it open?) Okay, now at least Canvas knows that Office365 exists.
Now, we’re going to go over to Office365 and create the information we’re going to push over. We’re going to ask PowerAutomate (what we used to call “Flow”) to look at our CoursePlan page (CP) in OneNote and save a snapshot that will be available to Canvas — and then repeat that every 6 hours or so and save it to Office365. Canvas will always see the most recent copy of the snapshot. Here goes!
Read through this first ... at the end, I'll give you a short cut to make this easier.
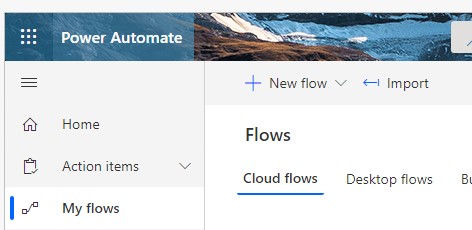
Head on over to http://office.com and log in with your school account. You’re looking for Power Automate so click on the Waffle (upper left corner) and see if it’s listed there. If not, click on ALL APPS and you should see it.

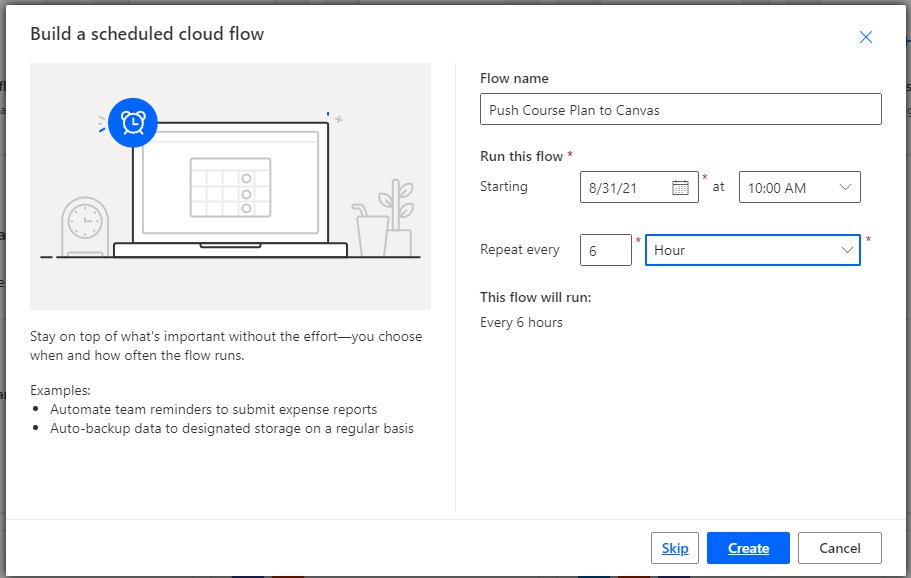
We’re going to create a Flow, so click on Create on the left-side and then the button Scheduled Cloud Flow. In the pop-up, give it a name and then schedule it for every 6 hours (or more depending on how many changes you think you’ll make during the day. I tend to put the course plan together and then make only minor changes in class.)
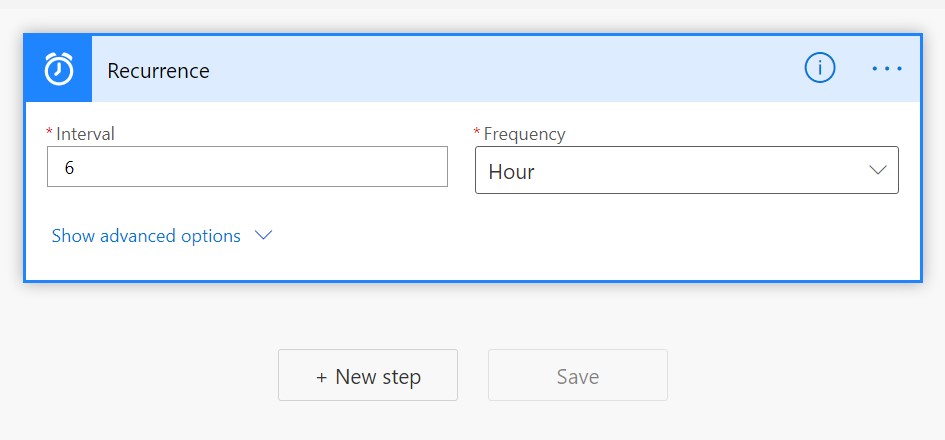
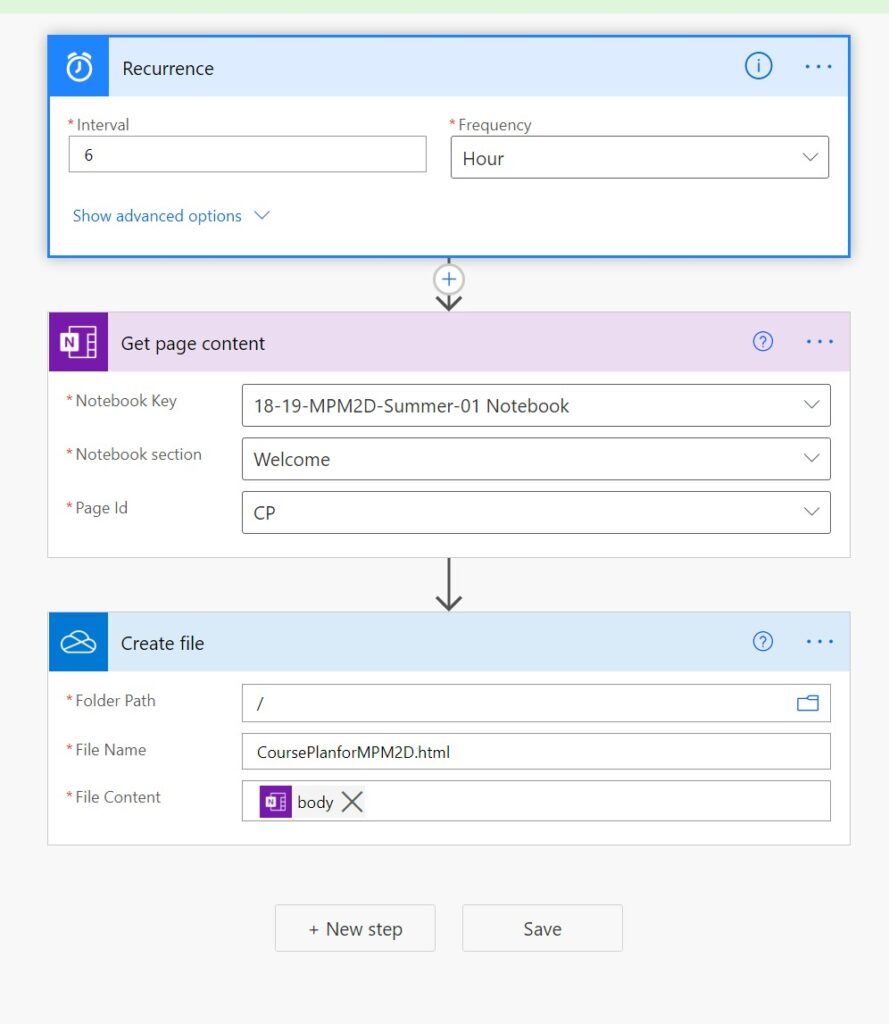
Once you click okay, you’ll notice you’ve already started the Flow! There’s a Recurrence box at the top. If you click on it to open, you’ll see the settings that you put in the previous screen.
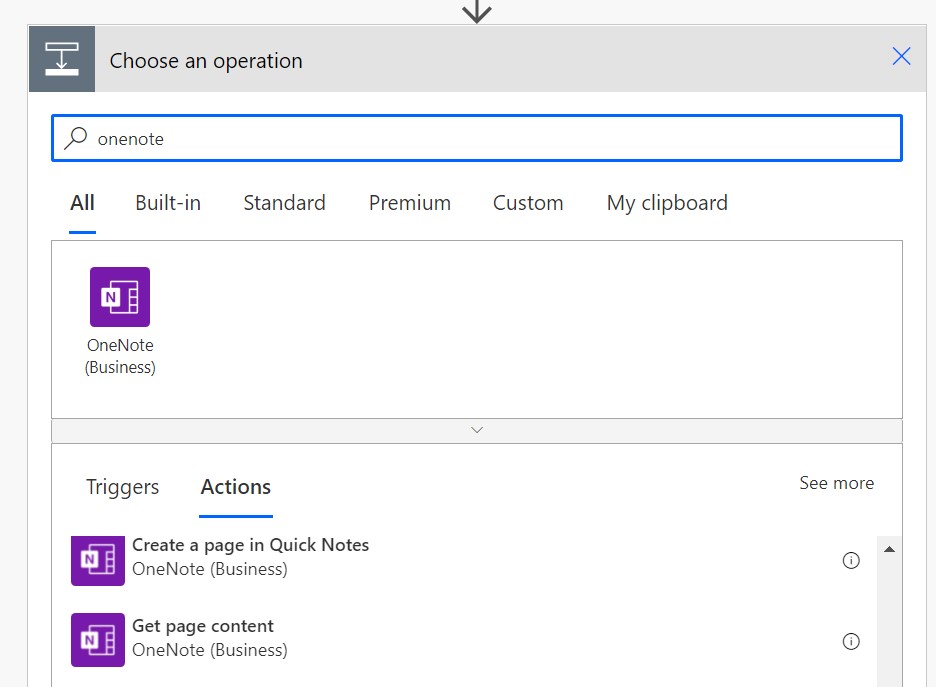
Now we’re going to add the step where it grabs the OneNote Page. Click on NEW STEP and now we’re going to look for the OneNote (Business) collector (type OneNote in the search box) and then click on the Get Page Content option that appears in the box below (you might have to scroll down a bit). It may ask you to log in with your Office365 credentials, just to be sure.
Notice there are three boxes — which Notebook, which Section, which Page.
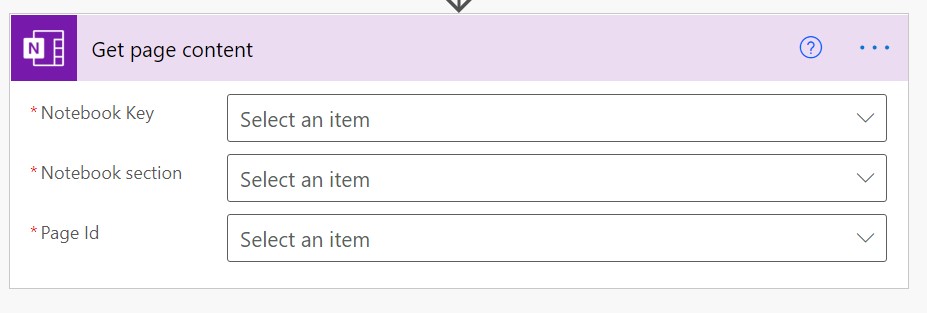
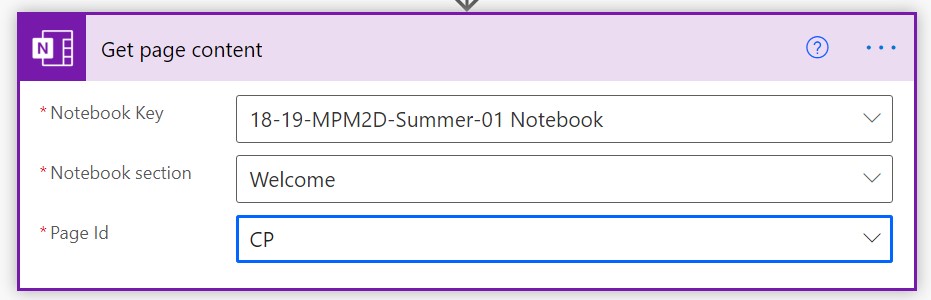
Fortunately, it’s smart … in the Notebook dropdown, pick which ClassNotebook you’re using and then the Section box will only contain the Sections from that ClassNotebook! Likewise, the Page box will only contain the Pages in that Section. So, make the right choices so that you can choose the CP Page in the last box.
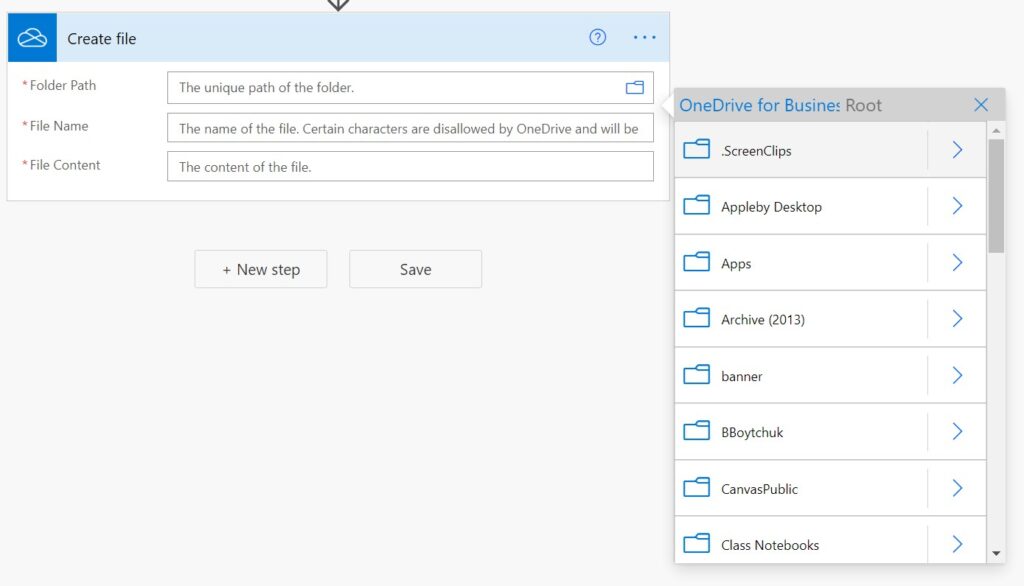
Now, let’s add the step that makes the file that Canvas is going to show. Click on ADD STEP and then in the pop-up box, look for OneDrive for Business (yes, for Business… the OneDrive we use at school is business quality!) and then choose Create File as the action in the list that appears below.
Another 3 boxes to fill in! The first is where are you going to store your file? I usually just choose the first option you get when you click (called “The Root” or the top level of your folder) but you can drill down and pick another folder if you’d rather. You can quickly jump into your OneDrive and create one folder to hold all your Course Plans for all your courses if you’re really organized. (Okay, I did do that – you can see CanvasPublic in the screenshot; it keeps your OneDrive neater).
Then give it a name. Now, it doesn’t really matter what it’s called, but the students are going to see it, so I thought I’d call it something useful! And it has to end with “.html” I went with CoursePlanforMPM2D.html (MPM2D is the government’s code for Grade 10 Math).
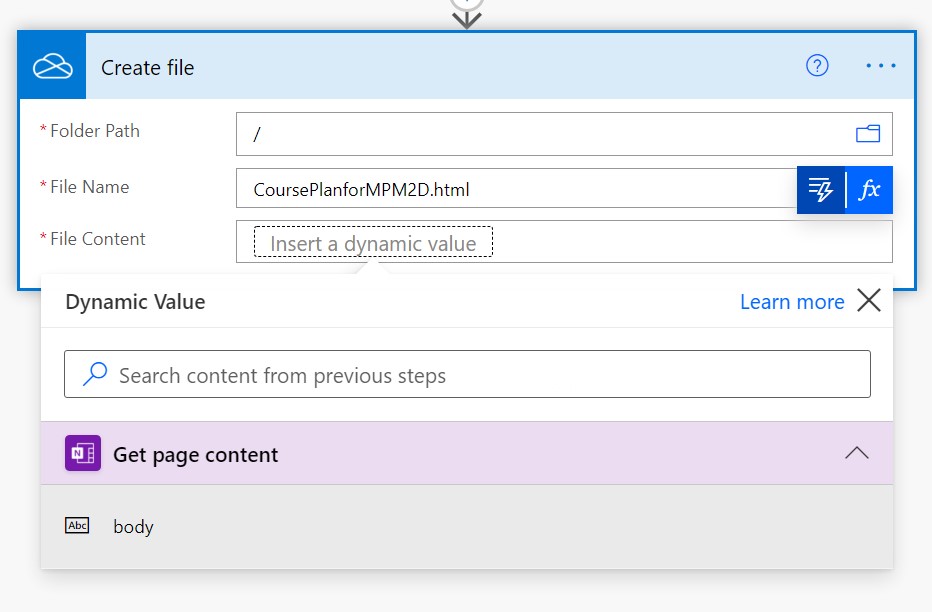
Lastly, what is going to be in the file? We’re going to tell the Flow to go back and use the information from the previous step, so click on the lightning rod in the corner of the box – that brings up the “dynamic” content list – and choose BODY.
That’s it! When you run this Flow, it will snag the OneNote Page and save it in your OneDrive called that name (and overwrite the old version — but remember, OneDrive keeps previous versions so you can go back and look at your Course Plan over time!) and then it will repeat every six hours.
Phew! Last step! Let’s get Canvas to show our Page.
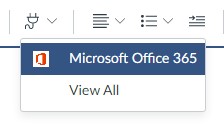
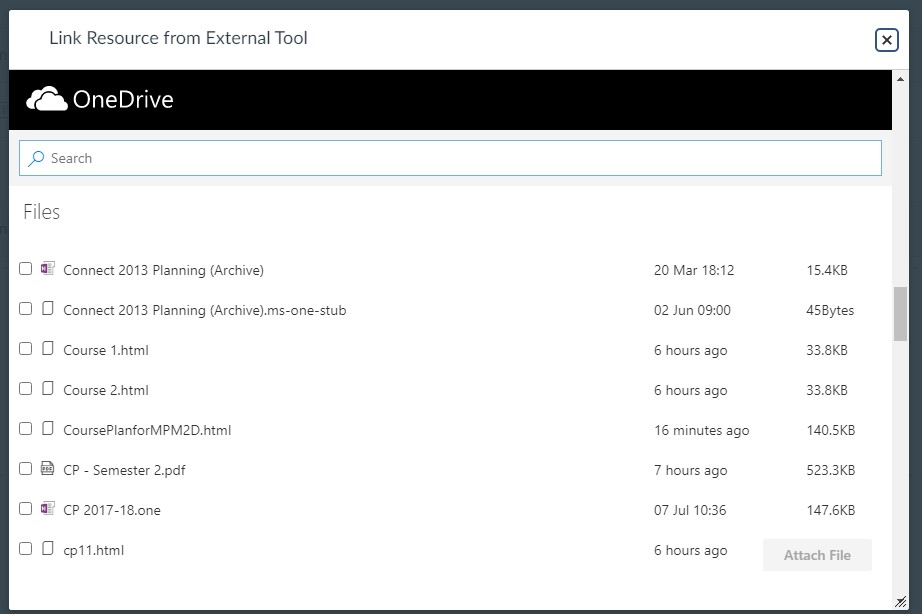
We have Office365 as an App, so whenever you’re editing content in Canvas, click on the APP button (it looks like an electrical plug) and choose Office365 and you’ll get your OneDrive.
Select your Course Plan file from your folder and click ATTACH and boom! There’s a link to your Course Plan. And that link is updated as soon as the Flow runs every 6 hours.
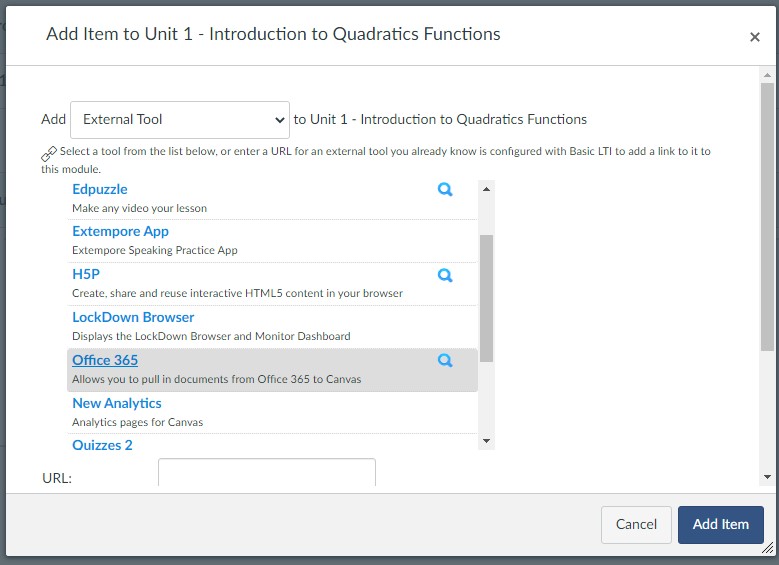
If you want to put it into one of your Modules, that works, too. You can click the + button and then choose EXTERNAL TOOL (why not keep the App name, Canvas?!?) and then choose Office365 and you’ll get your list of files and you can attach your Course Plan file as a Module item.
Now … that’s just ONE course. You get to connect the Office365 App, create a Flow to capture the OneNote and then make the link somewhere in Canvas to the file for THIS NEXT course. Now, I did make a Flow that does all five of my courses at once — the zip is here. You can import it by visiting PowerAutomate and clicking on IMPORT at the top and uploading the Zip file.
Using this five-courses-at-once Flow, you only have to connect the Office365 Apps to each of your courses and then make the links in each course to the correct file (notice in the 5-Flow you have to connect to the notebook, then give a filename for that course, and then a different notebook, different file name). If you have fewer course, you can delete a pair — if you have more, wow, my apologies, but you can add a pair just by following the steps above.
Caveat: When your password expires, you may get an email from Flow telling you that you need to re-connect things. Visit PowerAutomate and click the Fix Connection button and you’re done! PowerAutomate does keep track of every time things work or doesn’t work and will let you know if things aren’t working.
I shall either find a way, or make one. I’m so glad that Microsoft gives educators tools with which to make their lives easier. When impediments such as Canvas are placed in our way, it’s critical to find methods & routines that will minimize our stress and the demands on our time. And now that you’ve created one Flow, think of other places where you might want to automate things!

Wow! You found a way indeed! I will definitely be evangelizing the use of flow for those upset at being forced to use a vastly inferior product to manage course content.
[…] I shall find a way… […]